PVC-Free Fabric
Breathable, non-toxic, and odorless material that ensures a safe sleeping environment for your baby.


We create safe products that really work and are designed to make you feel good
Breathable, non-toxic, and odorless material that ensures a safe sleeping environment for your baby.
Original watercolor artwork by independent artists, giving your walls a bespoke, artisanal look.
Easy peel-and-stick application that removes cleanly leaving no residue, no peeling paint, and no damage.
THE PROCESS
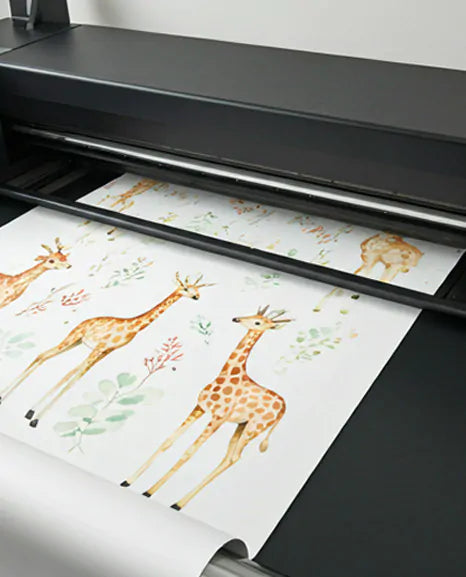
Every element is hand-sketched and painted in our studio.
We use eco-certified ink on PVC-free woven fabric.
Each decal is manually inspected for color perfection.
Packed in recycled tubes to arrive safely at your door.

Wall decals can last for several years indoors, but their actual lifespan depends on the material, adhesive, wall condition, installation, and environment. There is no universal lifespan that applies to every wall sticker. A decal installed on a clean, fully cured painted wall may remain attractive much longer than one exposed to moisture, intense sunlight, or frequent handling. For parents decorating a nursery or children's bedroom, durability matters just as much as design. You want wall decorations that stay in place, look beautiful, and can be changed when your child's interests evolve. But how long do wall decals really last? What makes some peel earlier than others? And are fabric wall decals more durable than vinyl stickers? This guide explains what affects wall decal longevity, how to recognize early wear, and what you can do to help your decorations last longer. How Long Do Wall Decals Last on Average? Wall decals are designed to provide decorative coverage for an extended period, but their lifespan varies considerably between products. Some manufacturers advertise an expected lifespan of several years for particular indoor wall graphics. However, these estimates should not be treated as a guarantee for all removable decals. The most reliable way to estimate how long a wall decal will last is to check the manufacturer's product-specific durability information and installation requirements. The following factors have the greatest influence on longevity: Factor Why It Matters Recommended Approach Material Different materials resist stretching, tearing, and wear differently Choose a product suited to your intended use Adhesive Determines how well the decal stays attached Check the manufacturer's surface compatibility guidance Wall texture Uneven surfaces can reduce adhesive contact Test the actual material before installation Paint condition Weak or uncured paint can affect adhesion Apply only to suitable, fully cured finishes Sunlight Prolonged UV exposure may contribute to fading Avoid excessive direct sunlight Humidity Moisture can interfere with some adhesive systems Use decals in recommended indoor conditions Cleaning Harsh cleaning can damage prints and edges Follow the product's care instructions Repositioning Repeated handling may affect adhesive performance Move decals carefully and only as intended For nursery and kids' room decor, the goal is not necessarily to keep the same design forever. A removable decoration that maintains its appearance while allowing the room to evolve may be more practical than a permanent wall treatment. What Affects the Lifespan of Wall Decals? 1. Wall Decal Material Material is one of the most important factors influencing wall decal durability. Traditional vinyl decals and fabric-based decals have different physical characteristics. Their performance also depends on the adhesive and printing system used. Vinyl Wall Decals Vinyl wall decals are typically made from flexible plastic films. Depending on the product, they may offer good resistance to ordinary handling and environmental exposure. However, some films can stretch, wrinkle, or become difficult to reposition without distortion. Durability varies by film formulation, thickness, print quality, and adhesive type. Fabric Wall Decals Fabric wall decals use a textile-based printable material rather than conventional vinyl film. Certain fabric decals are designed to be repositionable, making them useful for children's rooms where decorating preferences may change. At Dos Junior, our wall decals are made from PVC-free fabric and designed to be repositioned on suitable surfaces. Explore our fabric wall decals to discover decorative options for nurseries, playrooms, and children's bedrooms. 2. Wall Surface and Paint Condition Even a high-quality decal may struggle to adhere to an unsuitable wall. Painted walls should be clean, dry, stable, and fully cured before installation. Common surface problems include: Dust or residue that interferes with adhesion Flaking or poorly bonded paint Excessive wall texture Moisture trapped in the surface Recently applied paint that has not fully cured Dos Junior recommends waiting at least 3–4 weeks after painting before applying wall decals. Always follow the paint manufacturer's curing instructions, which may require additional time. A wall that feels dry is not necessarily fully cured. 3. Wall Texture Textured walls can affect how long decals remain attached. On a smooth wall, the adhesive may contact a relatively continuous surface. On a heavily textured wall, raised areas and recessed sections can create gaps. These gaps may allow corners or edges to lift over time. Some flexible materials can accommodate light texture, but no decal material should be assumed compatible with every wall. Before installing a large design, read our guide to wall decals on textured walls and consider testing a sample. 4. Sunlight and Temperature Sunlight can affect both printed color and adhesive performance. A wall that receives strong, direct sunlight for several hours a day may expose decals to greater heat and UV radiation than a shaded interior wall. Over time, depending on the product, this can contribute to: Color fading Material changes Adhesive deterioration Edge lifting To help preserve wall decals, avoid placing them close to intense heat sources or in locations with prolonged direct sunlight when the manufacturer advises against it. 5. Humidity and Moisture Moisture can interfere with the adhesion of some wall graphics. Rooms with persistent condensation, water exposure, or unusually high humidity may not provide ideal conditions for products designed primarily for dry interior walls. A nursery or bedroom with ordinary indoor conditions is generally a more appropriate location than a frequently damp surface. Always check the specific product's environmental requirements. 6. Installation Technique Installation mistakes can shorten a decal's useful life. If dust remains on the wall or the decal is applied with trapped air, some areas may not make proper contact with the surface. To improve the installation: Inspect the wall for damage or moisture. Confirm that the paint has fully cured. Clean the surface using a wall-safe method. Allow the wall to dry completely. Arrange the decal pieces before removing their backing. Apply each piece slowly according to the manufacturer's instructions. Smooth the material gently without excessive stretching. For larger designs, working with another person may help maintain alignment. Fabric vs. Vinyl Wall Decals: Which Lasts Longer? Neither fabric nor vinyl is automatically more durable in every situation. The answer depends on the material formulation, adhesive, printing process, wall conditions, and intended application. Feature Fabric Wall Decals Vinyl Wall Decals Material Textile-based printable material Plastic-based film Surface appearance Often matte or fabric-textured Available in matte, satin, and glossy finishes Flexibility Depends on fabric construction Depends on vinyl formulation Repositioning Available in reusable formulations Available in removable and repositionable formulations Potential wear Edges, adhesive, print, and handling Edges, adhesive, print, stretching, and handling Expected lifespan Product-specific Product-specific Best choice Depends on wall and decorating needs Depends on wall and decorating needs For parents who expect to update a nursery into a toddler room, repositionable fabric wall decals can offer practical flexibility. Dos Junior's PVC-free fabric decals are intended to support that kind of adaptable decorating. How to Make Wall Decals Last Longer: 8 Practical Tips 1. Choose a Suitable Wall Start with a clean, stable surface that matches the product's compatibility recommendations. Avoid installing decals over peeling paint, damp areas, or unstable finishes. 2. Let Fresh Paint Cure One of the most common mistakes is applying decorations too soon after painting. Follow both the paint manufacturer's curing requirements and the decal manufacturer's waiting period. For Dos Junior decals, allow at least 3–4 weeks after painting. 3. Remove Dust Before Installation Dust creates a barrier between the adhesive and the wall. Clean the wall gently using a method compatible with the paint, then allow it to dry completely. Avoid leaving cleaning residue behind. 4. Avoid Excessive Direct Sunlight When possible, select a wall that does not receive prolonged, intense sunlight. This may help reduce fading and temperature-related stress. 5. Keep Decals Away from Damp Areas Use wall decals in the conditions recommended by the manufacturer. Do not apply them to walls with active moisture problems or condensation. 6. Clean Gently Use a soft, dry microfiber cloth to remove light dust. For Dos Junior fabric decals, a very slightly damp cloth may be appropriate for light marks. Avoid soaking the material, scrubbing, or using harsh chemicals. Always test a small area first. 7. Avoid Unnecessary Handling Although repositionable decals are designed to be moved, repeated lifting and handling can introduce dust or damage delicate details. Reposition only when necessary and follow the product's instructions. 8. Inspect the Edges Occasionally Look for corners that have begun to lift, especially after temperature changes or room renovations. If a section begins peeling, identify the cause before attempting to press it back into place. Do not add household glue or an unapproved adhesive, as this may affect removability and damage the wall. Why Do Wall Decals Peel Off Early? Early peeling does not always indicate poor product quality. In many cases, adhesion problems are related to the surface or installation conditions. Common Causes of Wall Decals Peeling Problem Possible Cause What to Do Corners lifting Insufficient surface contact Check wall texture and cleanliness Decal falling off Incompatible paint or surface Review compatibility and test a sample Edges curling Material stress or environmental conditions Check installation and placement Adhesion weakening after moving Dust on the adhesive or handling damage Follow repositioning instructions Decal not sticking after painting Paint not fully cured Wait for the required curing period Localized lifting Moisture, residue, or uneven surface Address the underlying wall condition What If My Wall Decal Won't Stick? First, check whether the wall is clean, dry, and compatible with the product. Avoid using strong adhesives, glue sticks, or spray adhesive to force a removable decal to stay in place. These products may change the decal's removal characteristics and create additional wall damage. If you are using a Dos Junior product and are unsure why it is lifting, contact the team with photos of your wall and the affected decal. How to Clean Wall Decals Without Damaging Them Regular cleaning should be gentle. For most decorative wall decals, aggressive scrubbing and strong cleaning products are unnecessary and may damage the printed surface. Safe Cleaning Routine Step 1: Remove loose dust. Use a clean, soft microfiber cloth and wipe gently. Step 2: Inspect any marks. If there is a small mark, check the manufacturer's cleaning instructions before introducing moisture. Step 3: Use minimal moisture if permitted. For Dos Junior fabric decals, a very slightly damp cloth may be used for light cleaning. Step 4: Avoid rubbing the edges. Work gently so the material is not lifted accidentally. Step 5: Allow the surface to dry. Do not leave the decal saturated or repeatedly wipe the same area. What Should You Avoid? Bleach or strong household cleaners Abrasive sponges Excessive water Steam cleaning Scraping or scratching Unapproved adhesive removers A simple cleaning routine is usually preferable to intensive cleaning. Do Wall Decals Fade Over Time? Yes, some wall decals may fade over time. The extent of fading depends on the printing inks, material, UV exposure, and environmental conditions. A design installed away from intense direct sunlight may retain its appearance better than one placed on a heavily sunlit wall. However, without product-specific testing, it is not possible to guarantee that a particular decal will remain completely fade-free for a fixed number of years. To reduce the risk of fading: Choose a suitable indoor location. Avoid unnecessary exposure to strong sunlight. Follow the product's care instructions. Keep decals away from excessive heat. Can You Remove and Reuse Wall Decals? Some wall decals are designed for one-time use, while others can be repositioned or reused. Dos Junior's reusable fabric wall decals can be moved and reapplied when handled and stored carefully. That flexibility can be especially useful as a child's bedroom changes over time. For example, a woodland-themed nursery may later become a playroom with a different furniture arrangement. Repositionable decals can make it easier to update the wall design without starting from scratch. How to Store Reusable Fabric Wall Decals If you plan to reuse your decals: Follow the manufacturer's removal instructions. Lift the decal carefully from an edge. Avoid stretching or folding the design. Place it back onto its original backing paper, if recommended. Store it flat or in its original packaging as instructed. Keep it away from dust, moisture, and excessive heat. Dos Junior recommends keeping the original backing paper for future storage and reuse. Reapplication performance will still depend on the decal's condition and the new wall surface. For a complete removal guide, read How to Remove Wall Decals Without Damaging Paint. Are Wall Decals a Good Choice for Nurseries and Kids' Rooms? Removable wall decals can be a flexible decorating option for nurseries, playrooms, and children's bedrooms. They allow parents to introduce color, animals, nature-inspired illustrations, or educational themes without committing to a permanent mural. For example: Nursery: Gentle botanical designs or soft animal illustrations can create a calm visual theme. Toddler room: Larger animal illustrations, stars, or playful nature scenes can reflect a child's growing interests. Playroom: Educational illustrations, maps, or alphabet-inspired decor can add visual interest. Shared bedroom: Coordinated decal arrangements can help distinguish different areas while maintaining a cohesive design. A Note About Nursery Safety Wall decorations should be positioned thoughtfully in rooms used by babies and young children. Avoid placing removable decals where a child can reach, pull, or detach them, particularly around a crib or sleep space. For nursery decorating, choose a focal wall away from the baby's sleeping area rather than assuming that lightweight removable decorations are suitable above a crib. Inspect the decorations regularly and remove any loose pieces promptly. When Should You Replace Wall Decals? A wall decal does not necessarily need replacing after a predetermined number of years. Instead, assess its condition. Common signs that replacement may be appropriate include: Significant fading or discoloration Persistent edge lifting Material tearing or distortion Loss of adhesive performance Visible surface damage A design that no longer suits the room In children's bedrooms, replacement may also be a design decision rather than a durability issue. A decal can still be in good condition even when the room's theme changes. This is one reason repositionable wall decor can be appealing for families who enjoy refreshing their spaces. How Long Do Wall Decals Last in Different Rooms? Room conditions can influence wall decal performance. Room Main Consideration Recommended Approach Nursery Placement and child safety Use a suitable wall away from the sleep space Toddler bedroom Frequent touching and changing interests Choose appropriate, repositionable designs Playroom Higher activity and contact Position decals away from high-contact areas Living room Sunlight and appearance Avoid excessive direct UV exposure Home office Long-term decorative use Maintain stable indoor conditions Bathroom Humidity and condensation Use only products approved for the environment The room itself does not determine a fixed lifespan. Surface compatibility and environmental conditions remain the deciding factors. Frequently Asked Questions About Wall Decal Lifespan How long do wall stickers last? Wall stickers may remain in place for several years, but their lifespan depends on material quality, adhesive, installation, and room conditions. Always check the manufacturer's product-specific guidance rather than relying on a universal estimate. Are wall stickers durable? Many wall stickers are designed for extended indoor use. However, durability varies by product and may be affected by sunlight, moisture, cleaning, and handling. How long do vinyl stickers typically last? Vinyl sticker lifespan depends on the film, adhesive, print, and exposure conditions. Indoor and outdoor vinyl products may have very different durability ratings, so the manufacturer's specifications are the best reference. Do fabric wall decals last longer than vinyl decals? Not necessarily. Fabric and vinyl products use different materials and adhesives. Either may perform well when properly matched to the surface and environment. How do you preserve wall decals? Apply them to a compatible, clean, fully cured wall; avoid excessive moisture and direct sunlight; clean them gently; and follow the manufacturer's care instructions. Can wall decals last for years without peeling? Some products can remain adhered for years under suitable conditions, but there is no guarantee that every decal will do so. Wall texture, paint condition, adhesive formulation, and installation all influence adhesion. Why are my wall decals peeling after a few months? Possible causes include uncured paint, dust, unsuitable wall texture, moisture, temperature changes, or an incompatible adhesive. Inspect the surface and review the product instructions before attempting a repair. How long should paint dry before applying wall decals? Drying and curing are different processes. Dos Junior recommends waiting at least 3–4 weeks after painting, while also following the paint manufacturer's curing instructions. Can I clean wall decals with water? It depends on the material. Dos Junior fabric decals can be gently wiped with a very slightly damp cloth for light marks. Avoid soaking them or using harsh cleaning products. Can reusable wall decals lose their stickiness? Yes. Repeated handling, dust, damage, and unsuitable surfaces can affect reapplication performance. Proper removal and storage help preserve reusable decals. Can I move Dos Junior wall decals to another room? Dos Junior's reusable fabric decals are designed to be repositioned and reused when handled and stored carefully. The new wall must also be suitable for the product. Should I replace a decal if the corners start lifting? Not always. First, identify whether the issue is caused by dust, texture, moisture, or another compatibility problem. If the material or adhesive is damaged, replacement may be necessary. Final Thoughts: Choosing Wall Decals That Last How long wall decals last depends on more than the material alone. Wall preparation, adhesive compatibility, installation, sunlight, moisture, and daily care all influence their useful life. For the best results, choose decorations suited to your walls, follow the installation instructions, and care for the material gently. If you want the flexibility to refresh a nursery or children's bedroom as your family grows, repositionable fabric wall decals are worth considering. At Dos Junior, we create PVC-free fabric wall decals designed to bring imaginative, adaptable decor into children's spaces. Explore Dos Junior's wall decor collections and find a design that can grow with your room.
Learn more
Wall decals can sometimes stick to lightly textured walls, but adhesion is less predictable than on smooth surfaces. Fine orange peel or light knockdown textures may work with certain decal materials, while rough stucco, brick, popcorn textures, and deeply uneven surfaces are generally more challenging. The result depends on the wall finish, adhesive, decal material, and installation conditions. If you're considering wall decals for textured walls, the most important step is to check compatibility before ordering a full-size design. A wall decal might look beautiful in a nursery photograph, but the same product may behave differently on your own wall. Understanding your wall texture can help you avoid lifting edges, premature peeling, and disappointment after installation. In this guide, you'll learn which textures are more likely to work, why some decals fail, how to test a sample, and what to consider when decorating a nursery or child's room. Can Wall Decals Stick to Textured Walls? Yes, some wall decals can adhere to textured walls, but not every decal is suitable for every texture. Most removable wall decals rely on adhesive making consistent contact with the wall. When a surface has raised bumps, grooves, or uneven patches, parts of the adhesive may not touch the wall at all. That reduced contact can make the decal easier to lift or peel. Lightly textured walls may provide enough contact for a compatible material. Deeply textured walls are much less predictable. The safest purchasing approach is to: Identify your wall texture. Check the manufacturer's surface recommendations. Confirm that the paint and wall finish are suitable. Test the actual decal material in an inconspicuous area. Order the full design only after reviewing the test results. A successful sample test improves confidence, but it cannot guarantee how every piece will perform over time. Which Wall Textures Work Best With Decals? Not all textured walls present the same adhesion challenges. Use the following comparison as an initial guide, not a guarantee of compatibility. Wall surface Typical characteristics Decal compatibility considerations Smooth painted drywall Even, relatively flat finish Often the most suitable starting point when paint and adhesive are compatible Fine orange peel Small, shallow bumps Some products may adhere; a material-specific sample test is recommended Light knockdown Flattened raised areas with shallow recesses Results vary with texture depth and adhesive contact Heavy knockdown Pronounced ridges and recessed areas Greater risk of incomplete contact and peeling Popcorn texture Coarse, raised, irregular particles Generally unsuitable for standard removable decals Stucco Rough, grainy, sometimes sharp texture Often difficult; product-specific approval is essential Brick or masonry Uneven surfaces, mortar joints, porous finishes Standard decals may not adhere consistently across the surface The depth of the texture matters more than its name alone. Two homes can both have orange peel walls, yet one surface may have much more pronounced bumps than the other. Orange Peel Walls Orange peel texture has a slightly bumpy appearance resembling the skin of an orange. A fine version may be compatible with some flexible decal materials. A heavier version may prevent sufficient adhesive contact. Before purchasing, inspect the surface in side lighting. This makes raised areas and small recesses easier to see. If your wall has orange peel texture, request a sample of the material you're considering rather than assuming that every removable decal will work. Knockdown Textured Walls Knockdown texture usually features flattened raised patches separated by lower areas. Light knockdown can sometimes provide enough relatively flat contact points for a decal. Heavy knockdown is more challenging because the adhesive may bridge across deeper recesses. Pay particular attention to whether the edges remain attached during a sample test. An initially smooth-looking application doesn't necessarily mean the adhesive has made consistent contact. Popcorn, Stucco, and Brick Walls Highly irregular surfaces create larger gaps between the decal and the wall. Popcorn texture can also have fragile raised material that may loosen under pressure. Stucco may be rough or abrasive, while brick combines uneven faces with recessed mortar joints. For these surfaces, standard removable decals are generally a poor choice unless the manufacturer explicitly confirms compatibility. Avoid forcing an unsuitable decal onto a rough wall. If the product cannot make reliable contact, another decorating method may be more appropriate. Why Do Wall Decals Peel Off Textured Walls? A decal that won't stick isn't necessarily defective. Several factors can interfere with adhesion. Reduced Adhesive Contact On a smooth wall, more of the adhesive can touch the surface. On a textured wall, raised areas may support the decal while lower areas remain untouched. Less contact can mean a weaker bond, especially around narrow details and edges. Air Gaps Behind the Decal When a decal stretches across bumps and grooves, small pockets may remain underneath. These gaps can make the material appear raised or uneven and contribute to lifting over time. Dust, Residue, and Wall Contamination Textured surfaces can trap dust more easily than smooth ones. Grease, cleaning-product residue, loose paint, or powdery wall material can also interfere with adhesion. A wall may look clean from a distance while still having contamination in its recessed areas. Paint and Surface Finish Adhesion depends on more than texture. Some washable, stain-resistant, low-surface-energy, or specially coated paints can be difficult for adhesives to bond to. Fresh paint may also require a curing period beyond the point when it feels dry to the touch. Follow both the paint manufacturer's curing instructions and the decal manufacturer's requirements. Environmental Conditions Humidity, temperature changes, and repeated moisture exposure may affect certain adhesive products. Installation conditions and long-term performance vary by material, so check the manufacturer's recommended temperature and environmental limits. Fabric vs. Vinyl Decals on Textured Walls When shopping for wall decals, you'll often encounter different material options. Two common categories are fabric-based decals and vinyl decals. Neither is automatically suitable for every textured surface. Material General characteristics What to check before buying Fabric-based wall decals May be flexible and repositionable, depending on the product Specific adhesive, supported textures, removability, and sample availability Standard removable vinyl Available in many finishes, thicknesses, and adhesive types Whether the manufacturer approves the exact wall texture Specialty textured-surface films Designed for particular challenging surfaces Documented compatibility, installation requirements, and removal limitations Are Fabric Wall Decals Better for Textured Walls? Some flexible fabric-based decals can conform to minor surface irregularities. However, fabric alone doesn't determine adhesion. A fabric decal with an unsuitable adhesive may perform worse than a vinyl product specifically designed for the surface. The manufacturer's tested compatibility is more useful than a broad claim that one material always sticks better. Does Thicker Vinyl Stick Better? Not necessarily. Thicker material may behave differently around bumps and grooves, but thickness alone doesn't tell you how well the adhesive will bond. Adhesive chemistry, flexibility, surface contact, and the wall finish all matter. Choose a product based on its documented surface compatibility rather than thickness or price alone. What About Removable Decals? Removable doesn't mean compatible with every wall, and it doesn't guarantee damage-free removal. The result can depend on paint condition, surface preparation, how long the product remains installed, and the adhesive itself. For a more detailed explanation of removal considerations, see our guide to how to remove wall decals without damaging paint. How to Test a Wall Decal Before Ordering A sample test is one of the most useful steps you can take before buying a large decal for a textured wall. The sample should use the same material and adhesive as the full-size product. A sample made from a different film won't reliably represent the product you intend to purchase. Step 1: Choose a Representative Test Area Select a discreet section of the wall with the same paint and texture as the intended installation area. Avoid testing only on an unusually smooth patch if most of the wall is more heavily textured. Step 2: Prepare the Surface as Directed Follow the decal manufacturer's cleaning and drying instructions. Don't automatically use alcohol, abrasive cleaners, or other chemicals. Some wall finishes and adhesive products may be incompatible with them. Make sure the surface is fully dry before testing. Step 3: Apply the Sample According to Instructions Apply the sample using the pressure and technique recommended for that particular product. Don't use a heat gun, hair dryer, extra glue, or edge sealer unless the manufacturer specifically recommends the method. Adding heat or another adhesive can change the product's behavior and may damage the wall. Step 4: Observe the Sample Inspect the sample immediately after application and again after the observation period recommended by the manufacturer. Look for: Corners or edges lifting away from the wall. Air gaps that prevent consistent contact. Sections that release without being touched. Changes in adhesion as the room temperature varies. Visible damage to the wall finish. If no observation period is provided, ask the seller what test duration is appropriate for the material. Step 5: Evaluate Removal If the product is intended to be removable, follow its removal instructions when the test is complete. Check for paint lifting, adhesive residue, or changes to the finish. A decal that sticks well but damages the paint during removal may not meet your needs. Step 6: Decide Whether to Proceed If the sample lifts, fails to bond, or affects the paint, don't assume the full-size decal will perform better. Contact the manufacturer about alternative materials or consider another decorating approach. If you're interested in a Dos Junior design, review its product information and ask the team about available material options and samples for your particular wall. How to Prepare a Textured Wall for Decals Surface preparation can improve the conditions for adhesion, but it cannot make every textured wall compatible. Start with the product's own installation instructions. Check the Paint Condition The paint should be stable, fully cured, and free from peeling or powdery areas. A decal cannot reliably bond to a finish that is already separating from the wall. Remove Dust and Residue Clean the surface using the method approved for both the wall finish and the decal. Textured walls may require extra attention to remove dust from recessed areas. Allow the surface to dry completely. Confirm the Installation Environment Check whether the manufacturer specifies a suitable temperature range or other installation conditions. Avoid installing a product on a damp wall or in conditions outside its recommended limits. Don't Sand or Seal the Wall Without a Plan Sanding may permanently change the wall's texture and finish. Disturbing older coatings can also create additional hazards. Likewise, adding a sealer, primer, or extra adhesive may affect removability and paint compatibility. For a removable decorating project, it's generally better to select a product designed for the existing surface than to alter the wall without professional guidance. What to Do if Your Wall Decal Won't Stick If a decal begins peeling after installation, first identify the likely cause. What you notice Possible explanation Recommended next step Edges lift soon after application Inadequate contact, incompatible finish, or installation issue Check instructions and contact the manufacturer Decal sticks to raised bumps but bridges grooves Texture is too deep for consistent contact Consider a different product or location Several pieces detach over time Surface, adhesive, or environmental incompatibility Remove loose pieces and reassess suitability Adhesive doesn't bond after recent painting Paint may not be fully cured or may have an incompatible finish Confirm paint curing and compatibility requirements Paint lifts during sample removal Wall finish or adhesive is unsuitable for damage-sensitive removal Stop testing and seek product-specific advice Avoid repeatedly heating, pressing, or gluing a decal that is clearly incompatible with the wall. If the product is peeling in a child's room, remove any loose or accessible pieces promptly. Choosing Wall Decals for a Nursery or Child's Room Wall decals are popular for nurseries because they can add illustrations, color, and personality without requiring a full wall redesign. However, a nursery introduces additional placement considerations. Keep Loose or Peelable Pieces Out of Reach Small detachable pieces can become hazards if a baby or young child can pull them off. A textured wall that causes edges to lift increases the importance of careful placement and regular inspection. Never treat a successful initial installation as proof that the pieces will remain attached indefinitely. Choose a Suitable Focal Wall You don't have to decorate the wall directly behind the crib. A reading corner, dresser wall, or another area away from the sleep space may provide a better location. The American Academy of Pediatrics advises keeping the crib area free of potentially hazardous wall decorations and objects that could fall into the sleep space. Avoid hanging frames, shelves, mirrors, garlands, or other objects over the crib. Inspect the Installation Over Time Check for lifting edges, damaged sections, and pieces that may become accessible as your child grows. If a decal begins detaching, don't leave the loose section in place. For more ideas about choosing a decorative focal point, explore our Nursery Accent Wall Ideas. What if Your Textured Wall Isn't Suitable for Decals? A failed sample test doesn't mean you can't create a beautiful room. Consider alternatives that suit the wall and the room's safety requirements. Options may include: Decorating a smoother wall elsewhere in the room. Using paint to create an accent or illustrated effect. Choosing a manufacturer-approved wall covering designed for that specific surface. Creating a decorative focal point with furniture and textiles rather than adhesive wall graphics. For a nursery, avoid replacing an unsuitable decal with heavy or suspended decorations above the crib. If you are considering another adhesive wall covering, check its compatibility separately. Wallpaper and wall decals do not necessarily use the same materials or installation methods. Our Wall Decals and Wallpaper Guide explains the differences between these decorating options. Frequently Asked Questions Can wall decals stick to orange peel walls? Some decals can adhere to lightly textured orange peel walls, but results vary. Fine texture may allow sufficient adhesive contact, while pronounced bumps can cause lifting. Check the product's compatibility information and test a sample. Do wall decals work on knockdown texture? Light knockdown may be suitable for certain materials. Heavy knockdown is more difficult because its recessed areas can prevent consistent adhesive contact. A sample test is recommended before ordering. Why are my wall decals not sticking to my wall? Possible causes include deep texture, dust, uncured paint, an incompatible paint finish, moisture, or a mismatch between the adhesive and surface. Check the product instructions and inspect the wall before trying another installation. What are the best wall decals for textured walls? The best choice is a product whose manufacturer explicitly supports your particular wall texture. Flexible materials and specialty adhesive systems may help in some cases, but no single material is best for every textured wall. What sticks best to textured walls? That depends on the texture, paint, and intended application. Products specifically tested for the surface are more reliable choices than general-purpose removable stickers. For very rough walls, a non-adhesive decorating option may be preferable. Can I use a hair dryer to make wall decals stick? Only if the decal manufacturer recommends it. Heat may affect the adhesive, decal material, or paint finish. Don't assume that a technique suitable for one brand is safe for another. Will removable wall decals damage textured paint? They can. Removability depends on the adhesive, paint condition, surface preparation, and removal method. Test the actual material in an inconspicuous area and follow the manufacturer's instructions. Can I put wall decals on freshly painted textured walls? Wait until the paint has fully cured according to the paint and decal manufacturers' instructions. Dry-to-the-touch paint isn't necessarily ready for adhesive decorations. Final Thoughts: Test the Wall Before You Commit Wall decals can work on some textured walls, especially when the texture is light and the adhesive is designed for the surface. But there's no universal guarantee. The most dependable approach is to identify your wall texture, check product compatibility, and test the actual material before purchasing a large design. If the sample performs poorly, choose a different material or decorating location rather than trying to force the decal to stick. At Dos Junior, you can explore illustrated wall decor for nurseries and children's rooms. Before ordering, check the specific product's material and installation details, and contact the team if you need help assessing your wall surface. A beautiful result starts with choosing a design that suits both your room and your wall.
Learn more
You've found the perfect nursery wall decals. The colors match your furniture, the illustrations fit your theme, and you can already imagine how they'll look in your baby's room. But there's one question that can make or break the finished design: What size wall decal should you buy? A design that looks impressive in a product photo might appear tiny on a large wall. Another could overwhelm a compact nursery or disappear behind furniture. And when a decal set contains several separate pieces, the dimensions listed on the product page may not represent the finished arrangement. Choosing the right nursery wall decal size starts with measuring the space you actually want to decorate, understanding the product dimensions, and previewing the design before ordering. This guide walks you through each step, with practical examples in inches and centimeters. What Size Wall Decal Do You Need for a Nursery? The ideal nursery wall decal size depends on three things: the usable wall space, the furniture near the design, and whether the decal is a single illustration or a multi-piece arrangement. There isn't one standard size that works for every nursery. A small animal illustration may be perfect beside a reading chair but look lost on a wide, empty wall. A large botanical composition can create a beautiful focal point in a spacious room but feel crowded when squeezed between a window and a wardrobe. The simplest rule is to measure the available space first and choose the decal second. Before shopping, identify: The wall you want to decorate. Its usable width and height. Any furniture that will remain in front of the wall. Windows, switches, shelves, vents, and other obstructions. Whether the product dimensions refer to one piece, a sheet, or the completed composition. These details will help you make a more reliable decision than judging scale from a styled product photograph. How to Measure Your Nursery Wall Correctly You don't need professional measuring equipment. A tape measure, painter's tape, and a few notes are enough. Step 1: Measure the Full Wall Measure the width from one side of the wall to the other and the height from the floor to the ceiling. Record the measurements in centimeters or inches, depending on how the product dimensions are displayed. For example, your wall might measure: Wall width: 300 cm (approximately 118 inches) Wall height: 240 cm (approximately 94 inches) These are your overall dimensions, not necessarily the space available for decoration. Step 2: Identify the Usable Area Subtract the areas interrupted by furniture, windows, doors, built-in storage, or fixtures. Imagine a 300 cm wall with a wardrobe on one side. After accounting for the wardrobe and the clearance you want around it, you may have only 180 cm of usable width. That 180 cm is the more useful measurement when choosing a decal. Don't forget to consider height. A design can fit horizontally but still extend behind a dresser or overlap a shelf. Step 3: Measure Nearby Furniture If you're decorating a wall behind a dresser, chair, or storage unit, measure the furniture as well. A design can look visually disconnected when it is much narrower than the furniture below it. Conversely, an oversized composition may compete with the furniture or extend into another functional area. For example: Dresser width: 120 cm Usable wall width: 180 cm Decal composition width under consideration: 100 cm A 100 cm design may create a balanced focal point above the dresser, depending on its shape and the surrounding space. This is a styling example, not a required proportion or safety clearance. Step 4: Mark the Design on the Wall Use low-tack painter's tape to outline the proposed decal dimensions. Stand in the doorway and look at the taped area. Then check it from the reading chair or another normal viewing position. Ask yourself: Does the design feel too small for the wall? Will it compete with nearby furniture? Is there enough breathing room around the illustration? Could future furniture changes interfere with it? If possible, leave the outline in place for a day before making your final decision. How to Match Wall Decal Size to Nursery Furniture Furniture is often a better visual reference than the wall's total width. The goal is to make the decal feel connected to the room rather than floating in an unrelated space. Above a Dresser or Changing Station A dresser provides a natural horizontal reference for a wall illustration. Suppose the dresser is 120 cm wide and the available wall area is 180 cm wide. You might compare three options: Decal width Approximate width in inches Possible visual effect 60 cm 24 in Small accent with substantial empty space 100 cm 39 in More prominent focal illustration 160 cm 63 in Wide composition extending beyond the dresser These are examples of how different widths can change the appearance of the same area, not universal recommendations. A tall tree illustration and a wide group of animals may look very different even when their overall widths are similar. Remember: The changing area must remain functional. Keep detachable decorations and other potentially hazardous objects away from places a child could reach. Beside a Reading Chair A reading corner often works well with a tall, narrow decal. A botanical branch, illustrated tree, or vertical animal arrangement can emphasize the height of the wall without requiring a wide composition. Measure the available area beside or behind the chair, accounting for floor lamps, book storage, and the chair's actual position. Check the arrangement while seated, not just while standing. On a Large Empty Wall A spacious wall can support a wider design, but bigger isn't automatically better. Consider whether you want one statement illustration or a scene made from several pieces. A large watercolor animal can create a strong focal point on its own. A set of smaller woodland animals may need more spacing to achieve a similar overall presence. For additional ideas about organizing a focal wall, explore our Nursery Accent Wall Ideas guide. What About the Wall Behind the Crib? The wall behind a crib is a popular location in nursery photographs, but appearance should never take priority over safety. Avoid hanging framed pictures, mirrors, shelves, garlands, signs, or other objects above the crib. The American Academy of Pediatrics' HealthyChildren guidance recommends limiting over-the-crib wall decoration to paint and wallpaper. For removable decals, don't assume that being lightweight makes them risk-free. Adhesive pieces can lift or detach. Follow the product's instructions and avoid any placement where a child could reach or pull pieces loose. If you're uncertain about a particular design or installation, choose a different focal wall away from the sleeping area. Nursery Wall Decal Size Examples in Inches and Centimeters Understanding dimensions becomes easier when you compare actual measurements. The following examples are illustrative design sizes, not standardized Dos Junior product sizes. Example design width Approximate inches Potential application 40 cm 16 in Small accent on a limited wall section 60 cm 24 in Compact illustration beside furniture 90 cm 35 in Medium-sized focal illustration 120 cm 47 in Statement design for a wider wall area 150 cm 59 in Large illustration or grouped composition 180 cm 71 in Wide feature-wall arrangement These widths don't tell the whole story. A 120 cm-wide illustration that is only 30 cm tall will feel different from a 120 cm-wide tree that extends almost to the ceiling. Always compare both width and height. Example: Choosing Between Two Sizes Imagine you have 180 cm of usable wall width and are comparing two versions of the same illustration: Option A: 70 cm wide Option B: 130 cm wide Option A occupies approximately 39% of the available width. Option B occupies approximately 72%. To calculate this: Decal width ÷ usable wall width × 100 = percentage of wall width occupied For Option A: 70 ÷ 180 × 100 = 38.9% For Option B: 130 ÷ 180 × 100 = 72.2% This percentage helps you visualize the difference. It is not a design rule: an illustration's shape, negative space, and placement matter just as much. Single Wall Decals vs. Multi-Piece Sets: Understanding the Dimensions One of the most common nursery wall decal sizing mistakes is assuming that every product is measured the same way. Single-Piece Decals A single-piece decal is usually easier to visualize because its width and height describe one connected design. For example, an animal illustration listed as 80 × 100 cm may have a finished footprint close to those dimensions, depending on how the seller measures the artwork. Confirm the orientation and measurement method before ordering. Multi-Piece Wall Decal Sets Multi-piece sets are different. A set might contain: One large giraffe Two smaller animals Several leaves Additional decorative elements The product listing may show the dimensions of the individual pieces, the backing sheet, or an example of the completed wall arrangement. Those measurements are not interchangeable. A set supplied on a 70 cm-wide sheet could cover a much wider wall after its pieces are spaced apart. Before ordering, check whether the stated dimensions describe the packaging layout or the final design. If that information is unclear, ask the seller for individual piece dimensions and an example of the finished arrangement. How to Calculate the Width of a Multi-Piece Arrangement Suppose you want to place three separate elements in a horizontal composition: First element: 40 cm wide Second element: 35 cm wide Third element: 30 cm wide Gap between each element: 15 cm The estimated finished width is: 40 + 35 + 30 + 15 + 15 = 135 cm That means your planned arrangement will occupy approximately 135 cm of wall width. This calculation assumes the pieces are arranged side by side without overlapping. A staggered or layered composition will have different overall dimensions. How to Preview Wall Decal Size Before Ordering You don't need to install anything to test whether a design looks right. Use Painter's Tape Outline the product's width and height on the wall. For irregular shapes, mark the main illustration rather than relying only on a rectangular boundary. Use tape suitable for your painted surface and remove it according to the manufacturer's directions. Make Paper Templates For multi-piece designs, cut paper shapes representing the largest elements. Attach the templates temporarily to the intended wall and experiment with different arrangements. This helps you test spacing, alignment, and visual balance before removing any adhesive backing. Check the Design From Several Angles Look at your layout: From the nursery doorway. From the chair or seating area. From the center of the room. With the lights on and in natural daylight. A decal may look perfectly proportioned close up but appear too small from the doorway. Don't Rely Only on Product Mockups Lifestyle photographs are useful for inspiration, but room sizes, furniture proportions, and image presentation vary. A design that appears large above a dresser in a product photo may not have the same effect in your home. The product's written dimensions should be your primary reference. Common Nursery Wall Decal Sizing Mistakes A few avoidable mistakes account for many disappointing wall arrangements. Measuring the Whole Wall Instead of the Available Space Windows, furniture, shelves, and doors reduce the space you can actually decorate. Measure the clear area where the design will sit. Ignoring the Height of the Artwork A wide decal isn't necessarily a tall one. Check the full dimensions, especially for trees, giraffes, rainbows, and vertical botanical designs. Confusing Sheet Size With Finished Size For multi-piece sets, ask what the listed dimensions represent. The backing sheet may be considerably smaller than the completed composition. Choosing a Size Based Only on the Product Photograph Styled photographs can make artwork appear larger or smaller than expected. Use measurements and wall templates before purchasing. Forgetting Future Furniture Changes The nursery layout may change when the crib is replaced, storage needs increase, or your child begins using the room differently. Consider whether your chosen artwork will still work if the furniture moves. Leaving No Space Around the Design An illustration squeezed between a window, wardrobe, and shelving unit can feel crowded even when it technically fits. Allow room for the composition to be visually distinct. When Should You Request a Custom Wall Decal Size? A custom size may be worth considering when standard options don't suit the available wall space. Common situations include: A narrow wall between two windows. An unusually high ceiling. A specific dresser or reading-corner arrangement. A large illustration that needs to fit a limited area. A multi-piece composition requiring particular dimensions. Before requesting a custom size, prepare the usable wall width and height, your preferred design, and a photograph or sketch showing nearby furniture. If you're considering a Dos Junior design, review the available size options on its product page and contact the team to confirm whether resizing is possible for that particular artwork. Not every design can necessarily be resized without changing its proportions, detail, or arrangement. Nursery Wall Decal Safety and Surface Checklist Choosing the correct size is only one part of a successful installation. Before placing a decal in a baby's room, check the following: Wall condition: The surface is clean, dry, stable, and suitable for the specific adhesive. Paint curing: Any newly painted surface has cured for the period required by the paint and decal manufacturers. Surface texture: The product is compatible with the wall's finish and texture. Placement: Individual pieces are away from areas where a child could reach, peel, or pull them loose. Obstructions: The design does not cover electrical outlets, vents, switches, or equipment. Product information: Material and safety claims are supported by the seller's actual documentation. Ongoing inspection: Edges and separate elements are checked for lifting or damage. Avoid relying on a universal installation height or an unsupported claim that any adhesive decoration is completely safe. If a design cannot be positioned and maintained appropriately, choose another location or decorating method. Frequently Asked Questions About Nursery Wall Decal Sizes What is the best nursery wall decal size? There is no universal best size. Measure the usable wall area, consider nearby furniture, and compare the product's actual width and height. Previewing the dimensions with painter's tape is one of the easiest ways to judge the fit. Should a nursery wall decal be centered on the wall or the furniture? For artwork intended to complement a dresser or reading area, centering it on the furniture grouping often creates a more cohesive composition. For a standalone feature wall, centering it within the usable wall area may work better. How do I know if a wall decal is too small? Outline the design on the wall and view it from the doorway. If the artwork feels disconnected from the furniture or disappears into a large empty area, consider a larger size or a different composition. How do I measure a multi-piece nursery wall decal set? Check the dimensions of the individual elements and plan the gaps between them. Add the widths and spacing for a side-by-side layout, or make paper templates for a more organic arrangement. Can I make a nursery wall decal larger? Some designs may be available in several sizes or eligible for customization. Check the specific product listing or ask the seller before ordering. Enlarging artwork may affect its proportions or level of detail. Should I measure in inches or centimeters? Either unit works as long as you use it consistently. If the product listing uses a different unit, convert the measurements before comparing them with your wall. For reference, 1 inch = 2.54 centimeters. Can I use a large wall decal in a small nursery? Yes, if the design fits the available wall area and doesn't interfere with furniture or fixtures. A single large illustration can sometimes look more cohesive than many scattered decorations. Final Thoughts: Measure First, Decorate With Confidence The right nursery wall decal size isn't determined by a universal chart or the appearance of a product photo. It comes from understanding your room. Measure the usable wall space, consider the furniture, compare both dimensions of the artwork, and check how multi-piece designs are arranged. A simple tape or paper preview can save you from choosing a decal that feels too small, too large, or awkwardly positioned. Once you've established the right dimensions, you can focus on finding artwork that suits your nursery's personality. Explore the illustrated wall decor available at Dos Junior, compare the measurements on individual product pages, and choose a design that feels thoughtfully proportioned to your space.
Learn more
“Hi, I’m Zuleyha Demir. When I was designing my first nursery, I noticed how many wall decals were made from toxic PVC vinyl. I knew there had to be a safer, more beautiful way to create magic for our little ones.”
That’s the day Dos Junior was born, with one mission: to bring high-end, hand-painted nursery wall decals and wall hangings to families who refuse to compromise on safety or beauty. Every piece from our animal wall decals to our signature world map is crafted in our Texas studio and printed on PVC-free, breathable fabric.
Have a question about a product, custom design, or installation? I personally read every message that comes in. Don’t hesitate to reach out — I’d love to hear from you.
Visit us
Questions about our nursery decor? Our team is here to help.
Your cart is currently empty.
Not sure where to start?
Try these collections: